
Getting Started with Blueprints AI
Blueprints AI helps A/E teams move from design to construction documents faster — while staying aligned with your scope, references, and internal standards.
What you need to start
Minimum Requirements
Provide these items in your first message before generation:
- Full address (e.g., 1234 Main St, Los Angeles, CA 90012)
- Program (e.g., 2 bed / 2 bath, single level)
- Area (total square footage, e.g., 2,500 SF)
- New build or existing (existing structure vs. new construction)
- Use & Occupancy (e.g., Residential, SFR, R-3)
Optional (but strongly recommended)
Upload anything that clarifies design intent, existing conditions, or constraints:
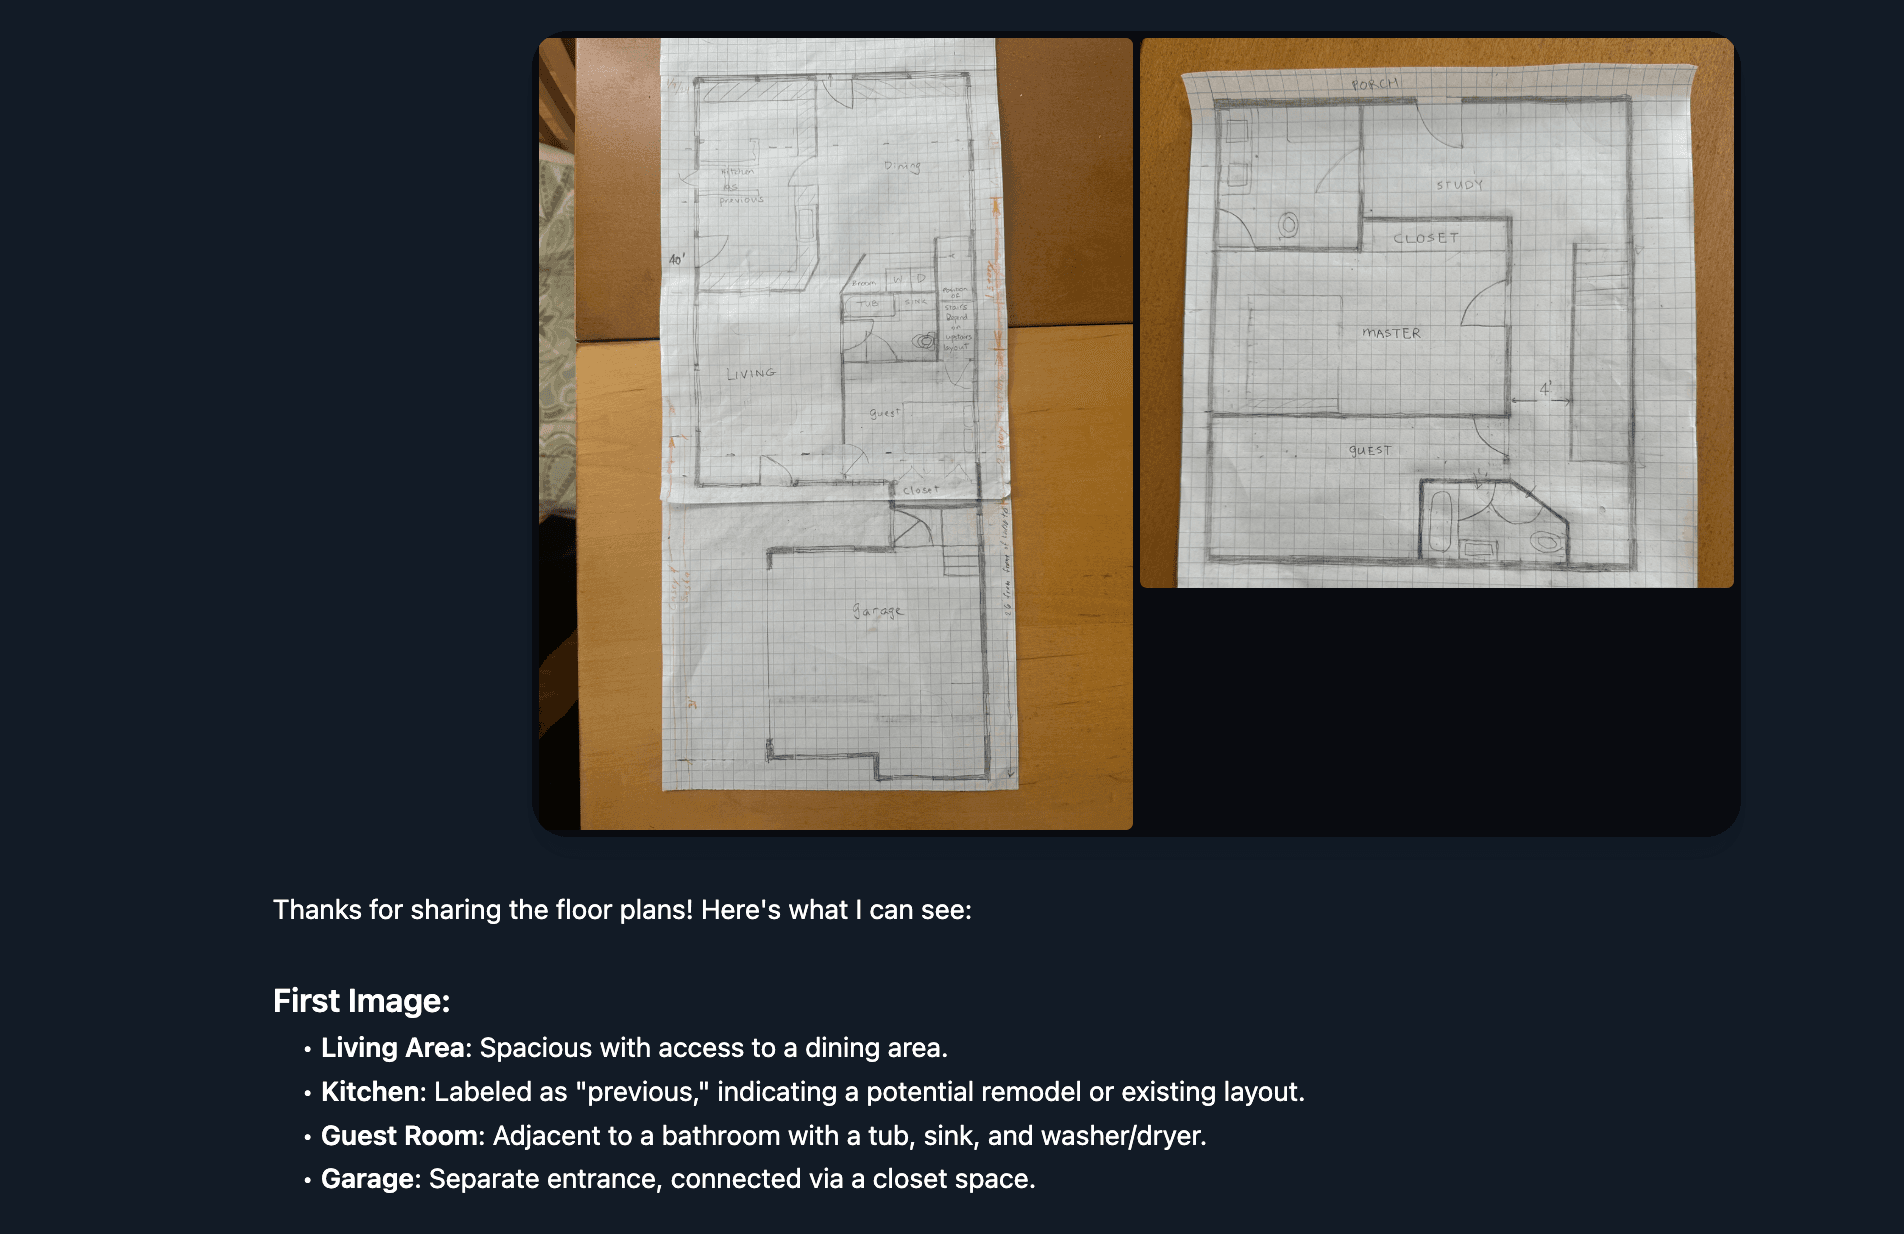
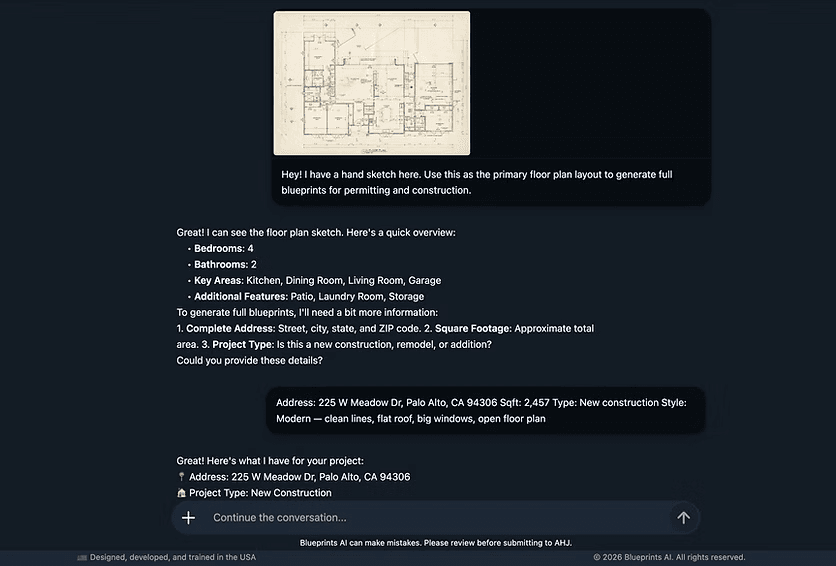
- Hand sketches / markups
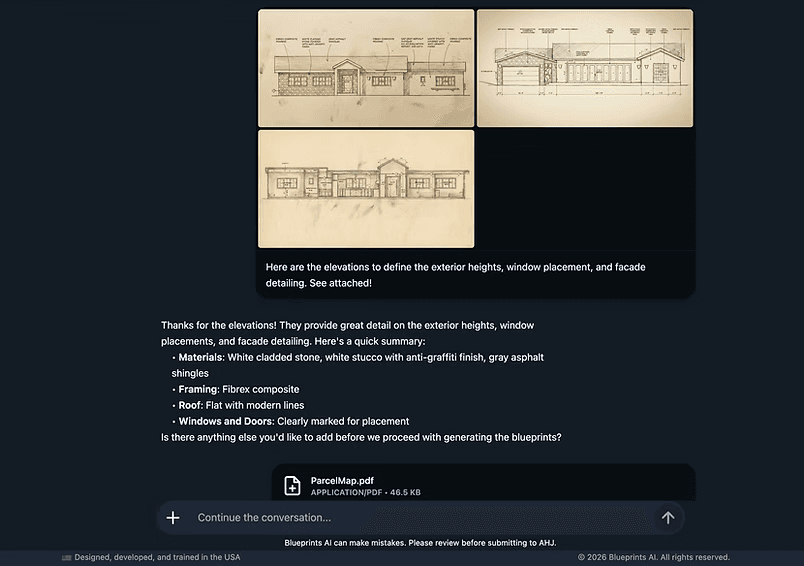
- Floor plans, elevations, sections, details
- Code notes, checklists, local amendments
- 3D scans / point clouds (if applicable)
- Your firm's title block, sheet templates, typical details
Accepted Formats
JPG
PNG
DWG/DXF (AutoCAD)
RVT (Revit)
SKP (SketchUp)
ZIP
Step-by-step Workflow

01
Create a new chat (one per project)
Set up one project per permit application to keep scope, revisions, and outputs organized.
Examples
- Project A: Office Building New Construction
- Project B: Single Family Remodel
- Project C: ADU Garage Conversion
02
Send the minimum required info in one message
Include the minimum checklist above in a single message. This improves accuracy and reduces credit usage.
Copy/paste starter template
- Address:
- Project type: (new / existing)
- Use & Occupancy:
- Program:
- Total area (SF):
- Notes/constraints: (setbacks, parking, existing conditions, design intent, etc.)
03
Upload reference files (recommended)
Reference files help the system understand your intent and constraints, resulting in clearer drawings and fewer revision cycles.
Helpful uploads
- Design documents: plans, elevations, sections, details, markups
- Models/scans: Revit, SketchUp, 3D scans
- Code/standards: local amendments, typical details, checklists
- Firm standards: title blocks, annotation styles, line weights, sheet templates
04
Request generation
Once the project details and files are in place, request the outputs you need.
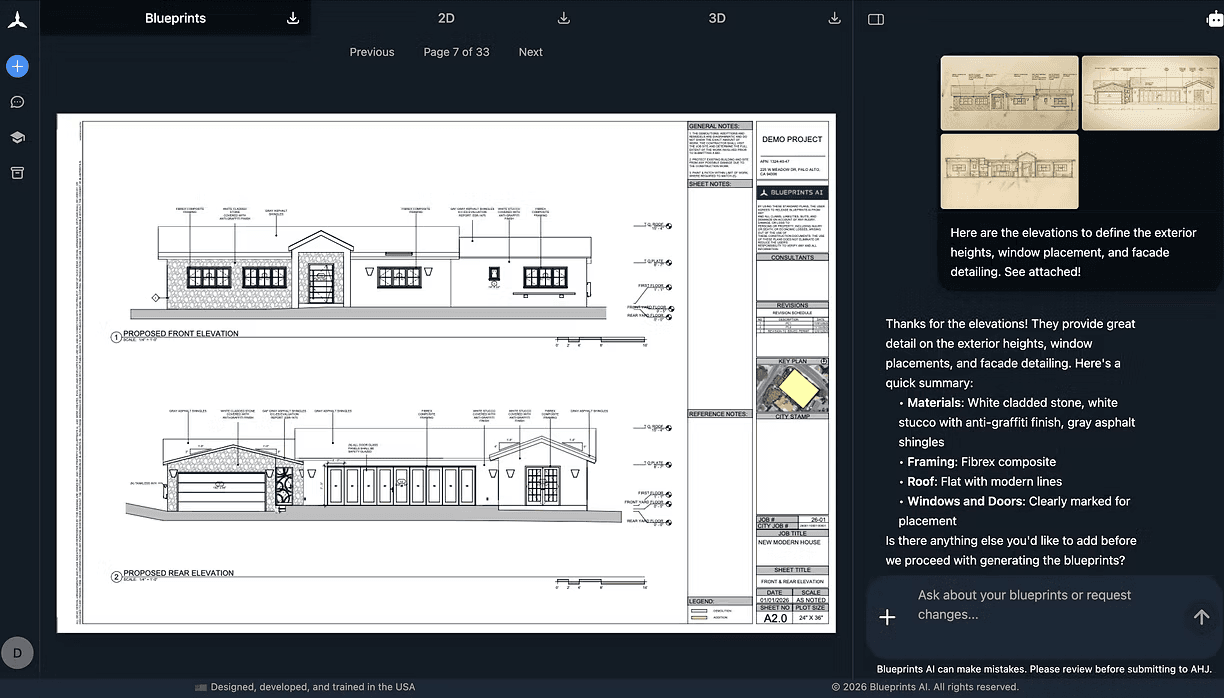
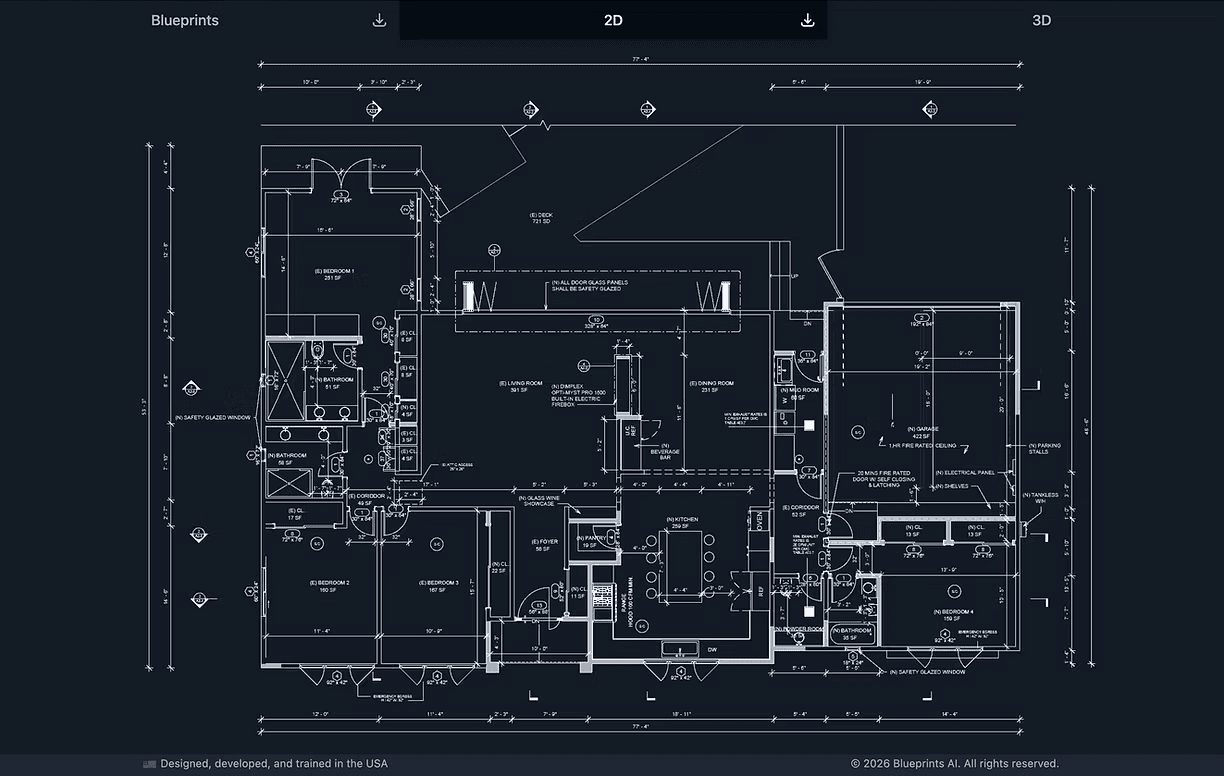
- 2D drawings: plans, elevations, sections, details
- 3D models: where applicable
- Drawing sets: organized sheets aligned to your standards and references
05
Review and request revisions (be specific)
For edits, specify exactly what to change to accelerate turnaround.
- Sheet name/number
- View (plan/elevation/section/detail)
- Dimensions, notes, tags, or layout changes
- Style updates (line weights, annotation conventions, title block)
06
Optimize workflow
- Consolidate information to reduce iteration cycles.
- Pause/stop a generation stream anytime if you need to adjust inputs.
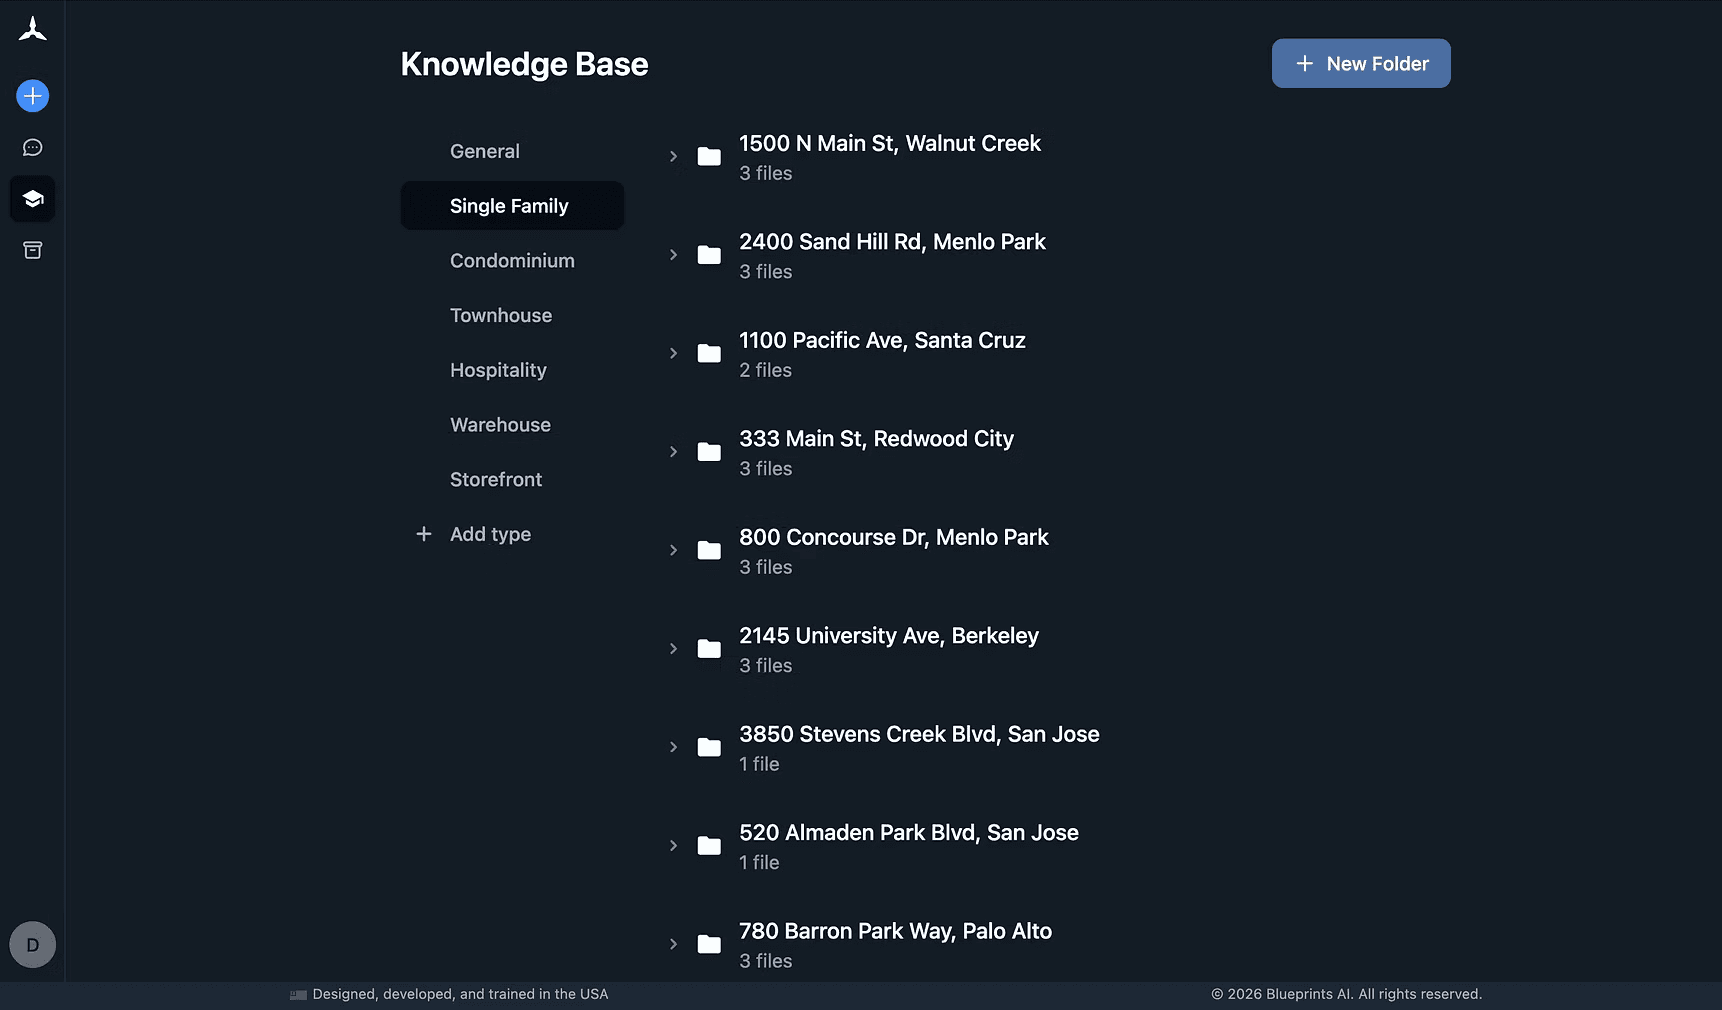
What is the Knowledge Base?
The Knowledge Base is where you store reference materials that guide output quality and consistency across projects.
What to upload at 'General'
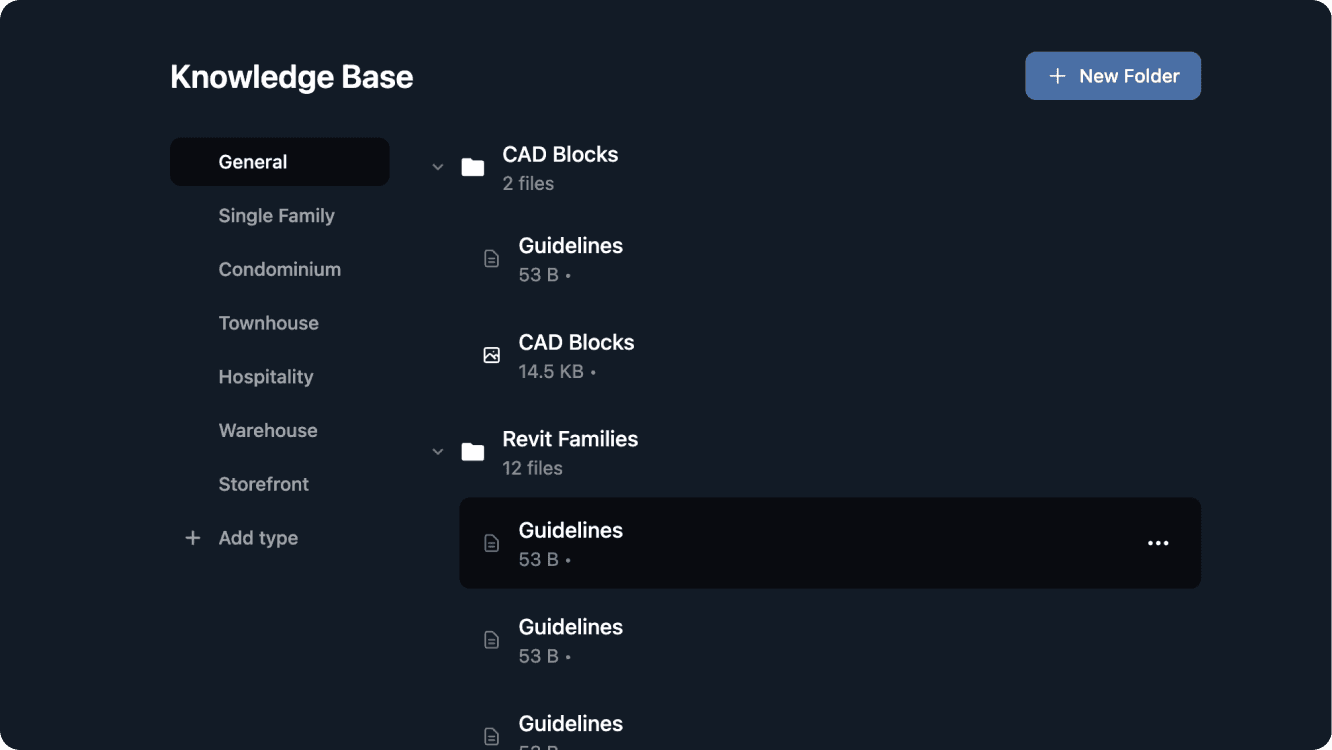
1. Guidelines - The rulebook everything else follows
- Dos and don'ts, naming conventions, export/print formats, file management rules
- Format: PDF, Word, Text
2. Drafting Standards - How drawings are set up and presented
- Line weights, layer naming, sheet sizes, title block requirements, scale conventions, hatch patterns, annotation styles
- Format: PDF, Revit, CAD, SketchUp
3. Revit Families - Reusable 3D/parametric building components
- Doors, windows, walls, roofs, structural elements, MEP fixtures, annotation families, title blocks, schedules
- Format: Revit (RVT, RFA, RTE)
4. CAD Blocks - Reusable 2D symbols and elements
- North arrows, door swings, furniture, fixtures, accessibility symbols, graphic scale bars, section markers, detail callouts
- Format: CAD (DWG or DXF)
5. Details Library - Reusable construction details
- Wall sections, connections, waterproofing, flashing, slab edges, parapet conditions - organized by CSI division or building element
- Format: Revit, CAD, PDF
6. Code Checklists & Internal QA References (Optional)
- Building code compliance checklists, internal quality assurance review sheets, sign-off logs
- Format: PDF, Word, Excel
7. Revision Standards (Optional)
- Revision numbering/lettering conventions, cloud and delta marker rules, revision block requirements, how and when to issue revisions
- Format: PDF, Word

What past projects to upload
- Past permitted and final drawing sets, final design files
- Format: PDF + native file of software used (CAD, Revit, SketchUp)
How many past projects should I upload?
- The Baseline: at least 10 projects to get started.
- The Sweet Spot: firms that upload 50+ projects see a significant improvement in output quality.
The more files you provide, the smarter your results become.
How should I organize my projects? (recommended)
- By project type (single family, townhouse, condominium, data center, pre-school, storefront, etc.)
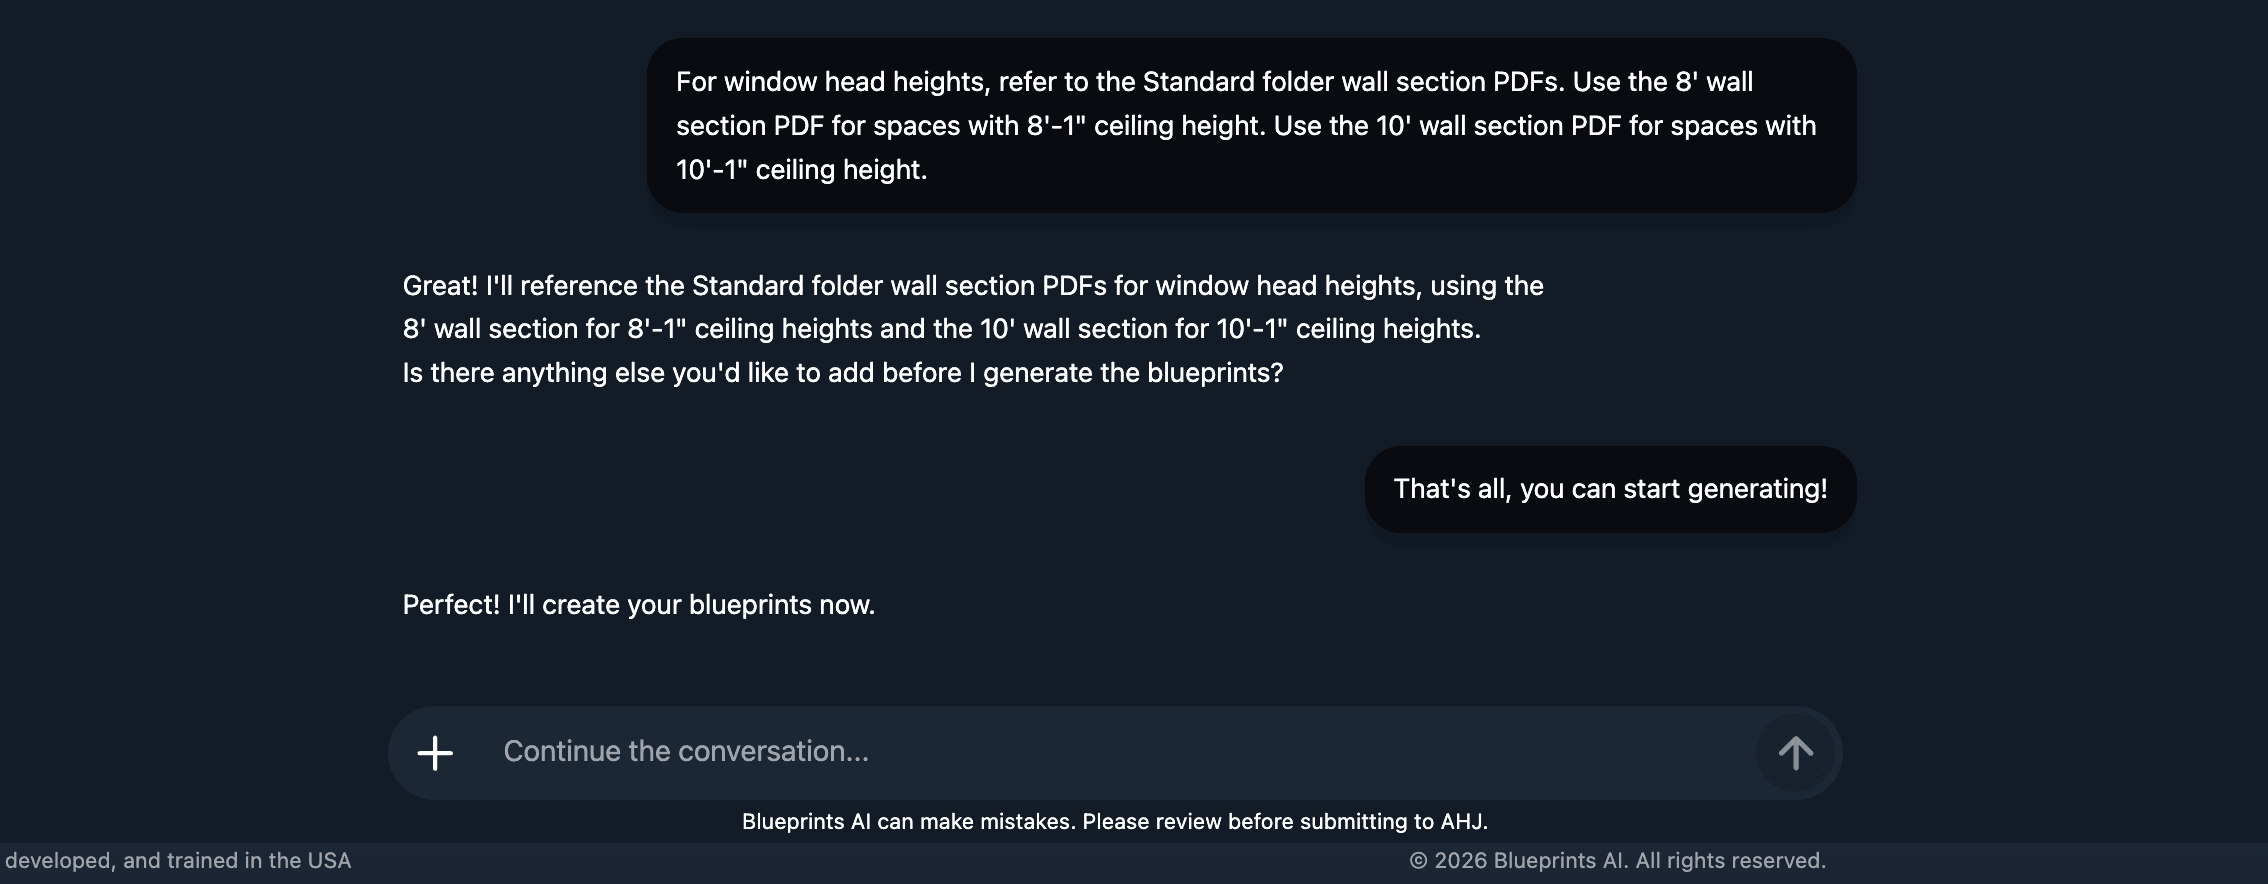
How to use it during chat
Simply reference the relevant Knowledge Base folder or files in your message (e.g., "Apply our Title Block v3 and Residential Notes Library").
Pro Tips
To save time and credits
One project = one permit application.
Keep scope and outputs clean (e.g., "ADU Garage Conversion" separate from "Kitchen Remodel").
Send key details in one message.
Consolidating inputs reduces back-and-forth and rework.
Use the Knowledge Base for better consistency.
Upload company guidelines, templates, libraries, and past project sets to match your firm's standards.